Coercing a Chromebook to run NixOS for Fun and Profit
March 15th, 2026 nix nixos tinkering chromebook
…but at what cost?
Heads up: this is a long (~5000 words), rambly tale that documents all the fun mishaps with the gizmo I’ve been playing with lately. If you’re interested in just the steps of how to get one of these working, you can skip to the Appendix where I lay the steps out more succinctly. I hope you’ll find the rest of this fun to read, though.
I recently received a truly wondrous and unexpected gift from one of my close friends, Aleksana, which some of you might know from her involvement with Nix, who might just have a bit too much time on her hands to tinker with tech. It was a little 11-inch Lenovo Chromebook that she thrifted from a second-hand seller for just 700 Chinese yuan (or pretty much exactly 100 US dollars, at the time of writing).
And of course, one does not receive a gift from a veritable Nix wizard without some sort of catch. In this case, the task was simple: go install NixOS on it.
Initially I was somewhat conflicted. I’m not a niche hardware person. In fact, I’m one of the few people in my social circle who thought that a MacBook Neo at full price looked even remotely appealing, since I don’t have to waste my time getting it all set up and polishing its rough edges. I’m not someone who gets excited because a device runs an architecture other than x86-64, and that somehow we’re gonna get it to work — and trust me, I have way too many friends who unconsciously salivate when they hear the words “RISC-V”, “LoongArch” or “MIPS32”.
To me, a large part of why I use Nix, is because I can dedicate a burst of hyperfocus energy on getting my config right, and not waste any time trying to adjust it or manually reproduce it. I don’t really enjoy the process of tinkering, or as I like to call it, tech-adjacent faffing-about, trying to fight against dodgy questionably-legal firmware or flimsy reverse-engineered graphics drivers.
But it just felt wrong to just do nothing with it.
“It’s a gift,” I told myself after a brief inner struggle, “especially one that didn’t cost me a cent. I should at least give it a shot. I don’t really have much to do this week anyway.”
And oh boy, what a week it had been.
I. The Device
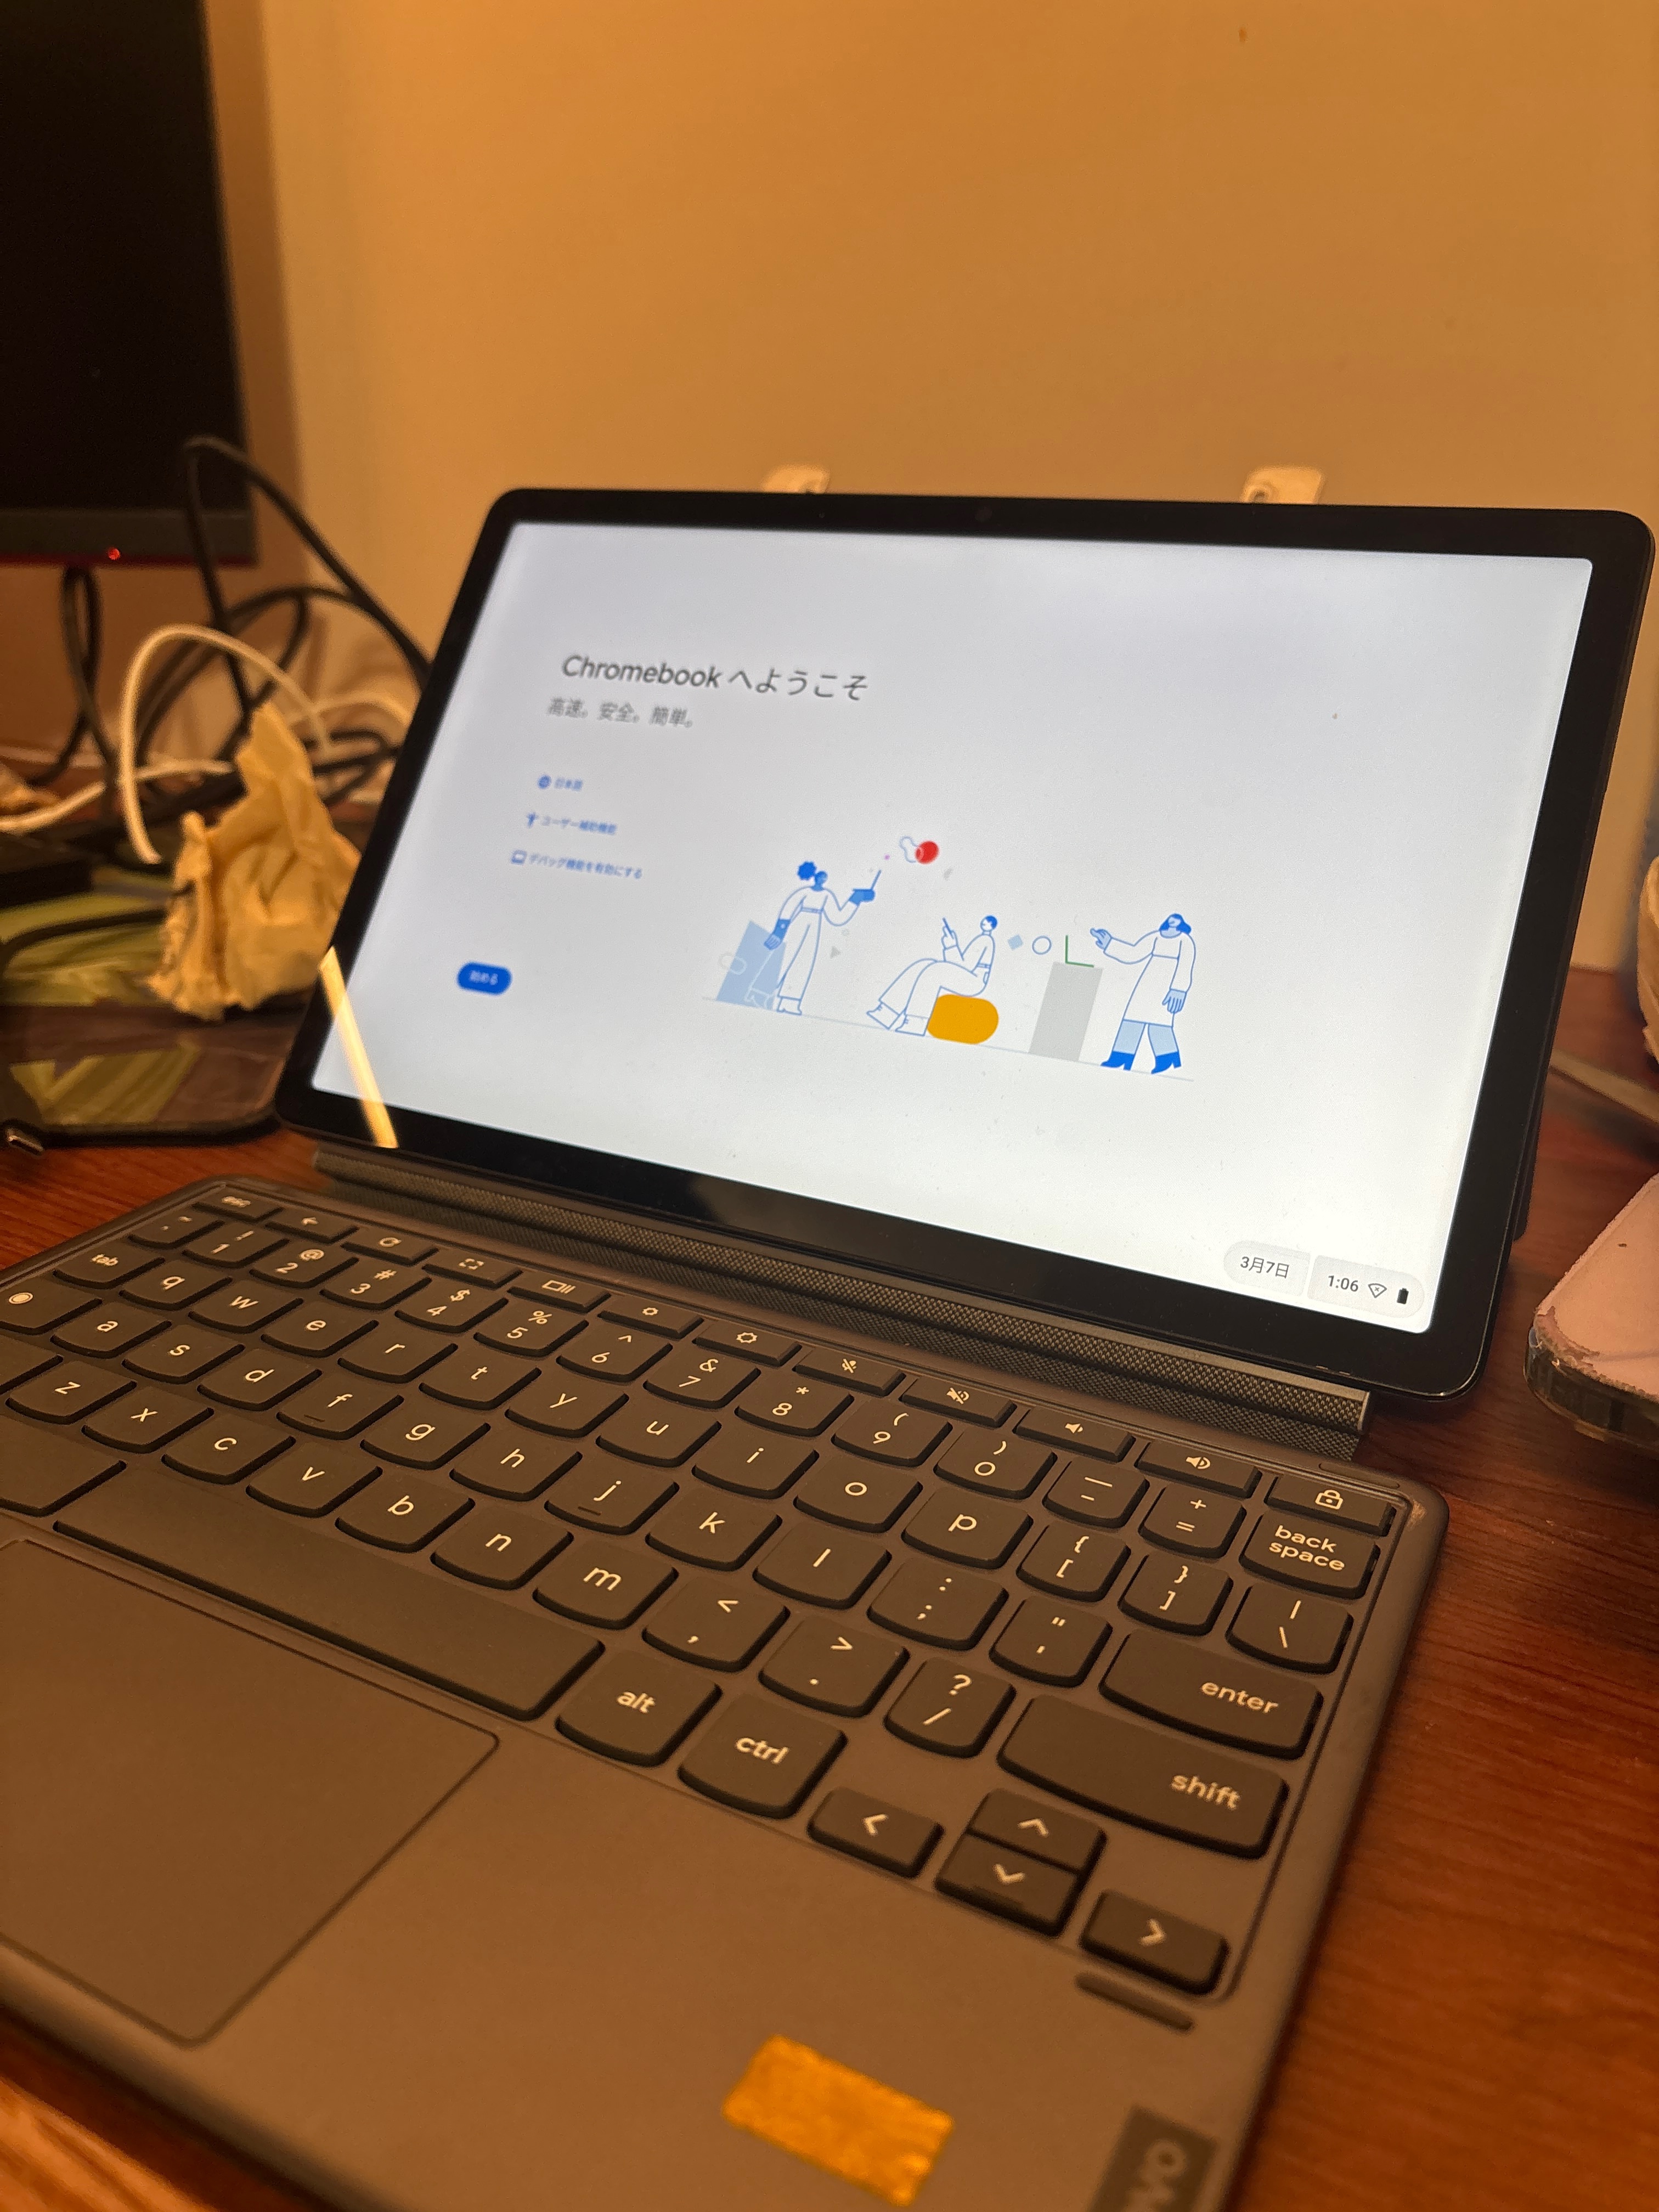
The exact model of this cute little number is the Lenovo IdeaPad Duet 3 (2021), more commonly known among homebrew Linux turbonerds by its codename, “Wormdingler.” At its core belies a Qualcomm Snapdragon 7c (SC7180) SOC, with an 8-core (2P6E) Kryo 468 CPU (of course it has to be one of those Chromebooks based on Arm and not x86), an Adreno 618 GPU, a built-in LTE modem, Wi-Fi 5 and Bluetooth 5.0 support, and more, all paired with 8 GB of RAM and 64 GB of eMMC internal storage. Connectivity-wise it has two USB-C 3.0 ports, plus bottom contact pins for the built-in detachable keyboard.
In my opinion, 100 USD for all of that, plus a 2000 x 1200 resolution 11-inch touchscreen, a keyboard and kickstand which together double as a protective case, is an absolute steal. It almost seems too good to be true. I mean, this model is apparently common enough among Linux enjoyers that there’s a fairly well-documented postmarketOS wiki page outlining everything you need to know to get Linux working. Surely it can’t be that hard, right?
Well… the problem is twofold. First is that we ain’t running just any Linux.
We are running NixOS, dammit, and that means we are delving into the
revolutionary domain of Mobile NixOS, aiming to infect more innocent
devices proselytize the glory of declarativeness and reproducibility to more
computers that couldn’t run NixOS through conventional means. Fortunately,
Wormdingler was one of the few devices that was labelled as “supported” by
the project — almost as if that was part of the plan (!) While Aleksana
had a fair bit of prior experience with Mobile NixOS, I cannot say the same
for myself, so I had to figure this out as I go.
The second problem is that, I don’t actually have a “normal” Wormdingler. Those keen-eyed among you might realize that the hardware description I gave earlier did not exactly match what is available online, not even the postmarketOS wiki page I linked to. This is no mistake. As it turned out, the exact machine I got was a pre-production model, which will have Exciting and Totally Not Frustrating Consequences later on. For now, though, this means that the journey I had to take to get NixOS working would be far more arduous than what online documentation suggests, and what both of us have expected.
II. Running Like Headless Chickens
In hindsight, I did a lot of dumb shit that truly served to waste my time, but it’s easy to see how they could be avoided. Documentation. However, we all know how “good” Nix is with its own official docs, yet somehow Mobile NixOS managed to lower the bar that was already stuck 30km below ground all the way down into the core of Planet Earth.
Let’s start with the “Getting Started” guide on the Mobile NixOS wiki:
For a limited set of devices, there is a guided installer that can be used to do your first-time install.
The device page for the supported devices will describe the requirements for the installer.
- Pine64 PinePhone
Obviously, I don’t have a PinePhone. And apparently, the only help I’m going to get, is how to clone the repository, and how I need to get my bootloader unlocked. Fortunately the device was in Developer Mode by default, so I don’t have to do anything.
Aaaaand that’s all you’re gonna get.
This is where it becomes harder to make a simple guide. These are different, heterogeneous, hardware platforms, with different quirks, compilation steps, and mainly, installation steps.
Fear not, look for your particular device on the devices list page, will likely contain the necessary instructions.
Okay then. What about the page specifically for Wormdingler?
This one is annoying to get started currently. Without a full Mobile NixOS build, you will need to fill in some gaps manually.
The upstream documentation about the disk format may help shed some light in understanding how these devices boot.
One of the important thing to realise is that you will likely need to
ddthe image to a storage media, either external or internal.
I’m not getting a good feeling out of this. What does a “full Mobile NixOS build” mean exactly? Where are the gaps I need to fill? Why do I need to know how they boot?
At this point I started panicking. I had already gone through the process of getting the regular ChromeOS working, and at this point I thought I need to perhaps enable Linux support within ChromeOS first. Later did I realize that this is only a containerized Linux implementation and not a real Linux system, but out of desperation I decided to turn it on… just for it to complain that I need to update ChromeOS first before I can enable Linux.
Now, this stood as being incredibly weird for me, since I had naïvely thought that I had a normal, well-updated, still-supported machine. When I went into the System Settings, it showed that I was on ChromeOS version 114.15437.63.0, and that I indeed needed to update. I am a loyal Firefox user, and had no idea when Chrome 114 was released.
It was from 2023.
Now that in and of itself would not be a problem on any normal Chromebook, but for some inexplicable reason once I hit “Update”, the screen went dark, and streaks and stripes of differently colored pixels started pulsating on the screen, arranged in rows that will pulsate periodically from left to right.
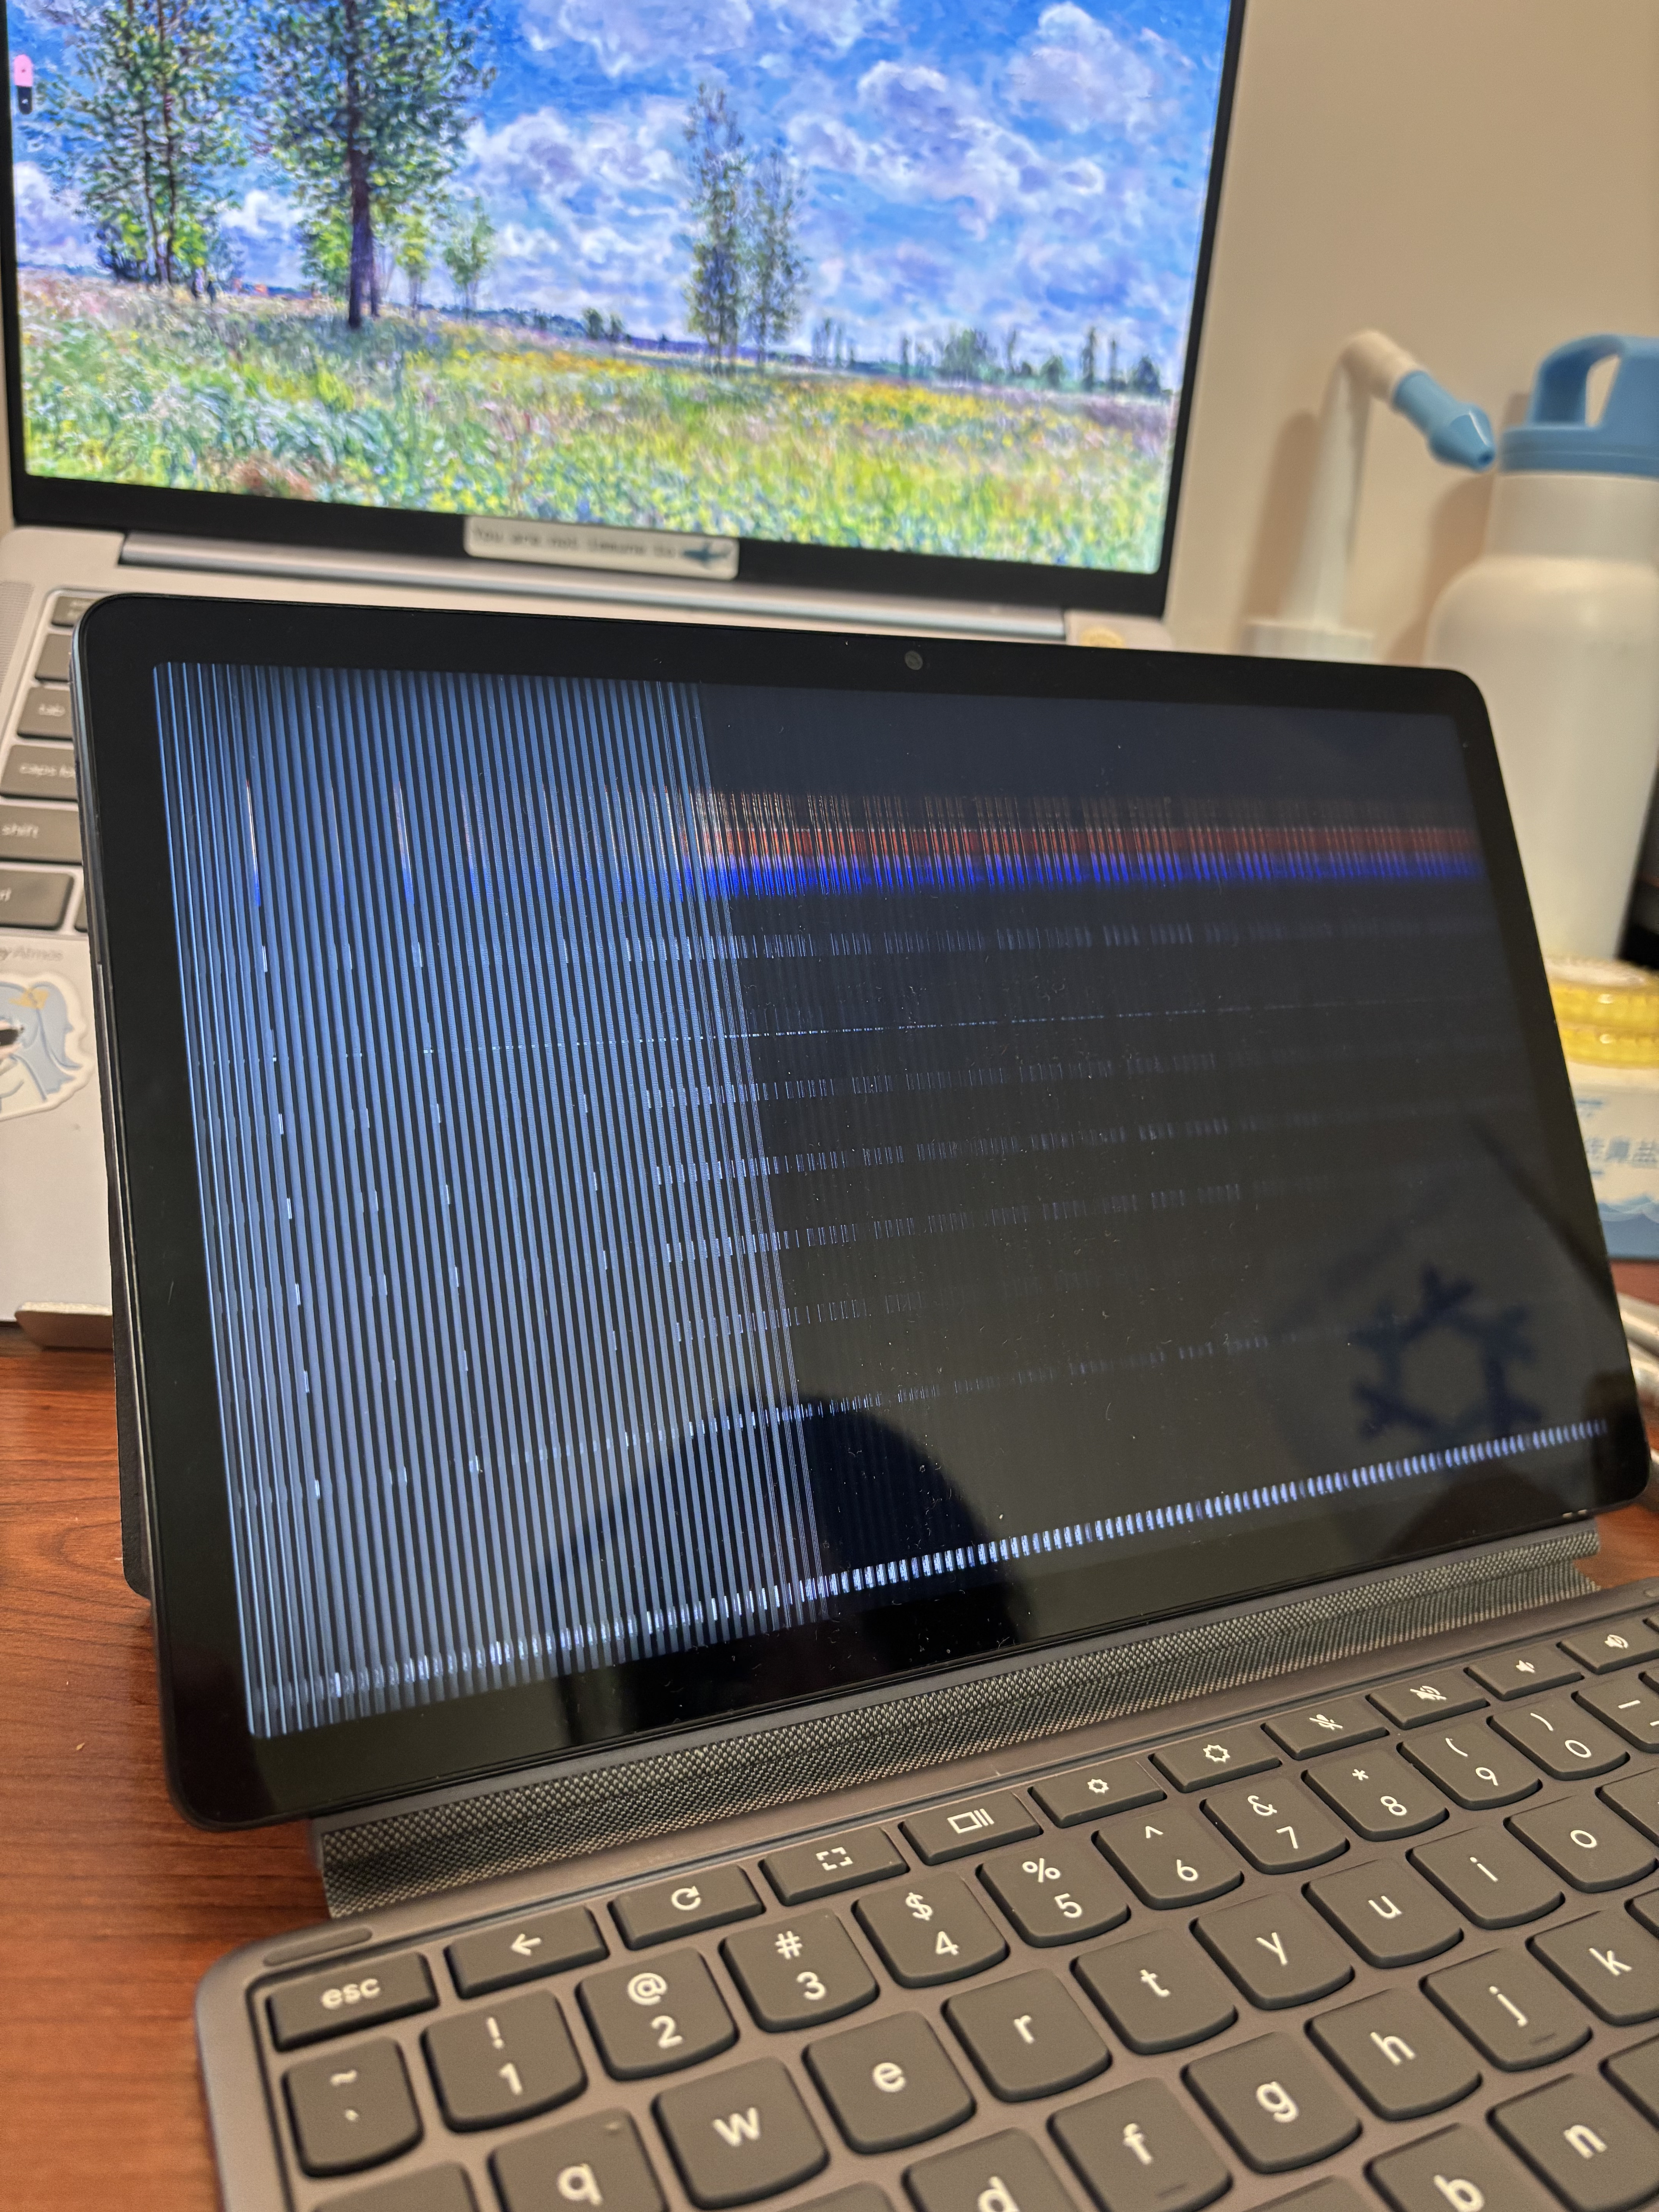
“Oh, I didn’t know that ChromeOS updates involved testing the display systems,” I thought to myself, “I know Google is pretty great with making sure things don’t break willy-nilly, but this seems overkill.” Then a minute passed. A minute turned into five. Five turned into ten. I got tired of waiting. “This thing only has like 8 gigs of RAM in total. There’s no way a screen test would take this long.” I tried then to switch off the Chromebook and turn it on again.
The streaks of color persisted on the boot screen, clearly in neat rows and strobing in regular pulses, but never forming a coherent picture. It was at that point I knew, I fucked up.
III. One Does Not Simply Update
To cut an extremely long debugging session short, it turns out that, surprise surprise, if you just stick to the known procedures and stop yourself from fucking around, you won’t have to find out what happens after.
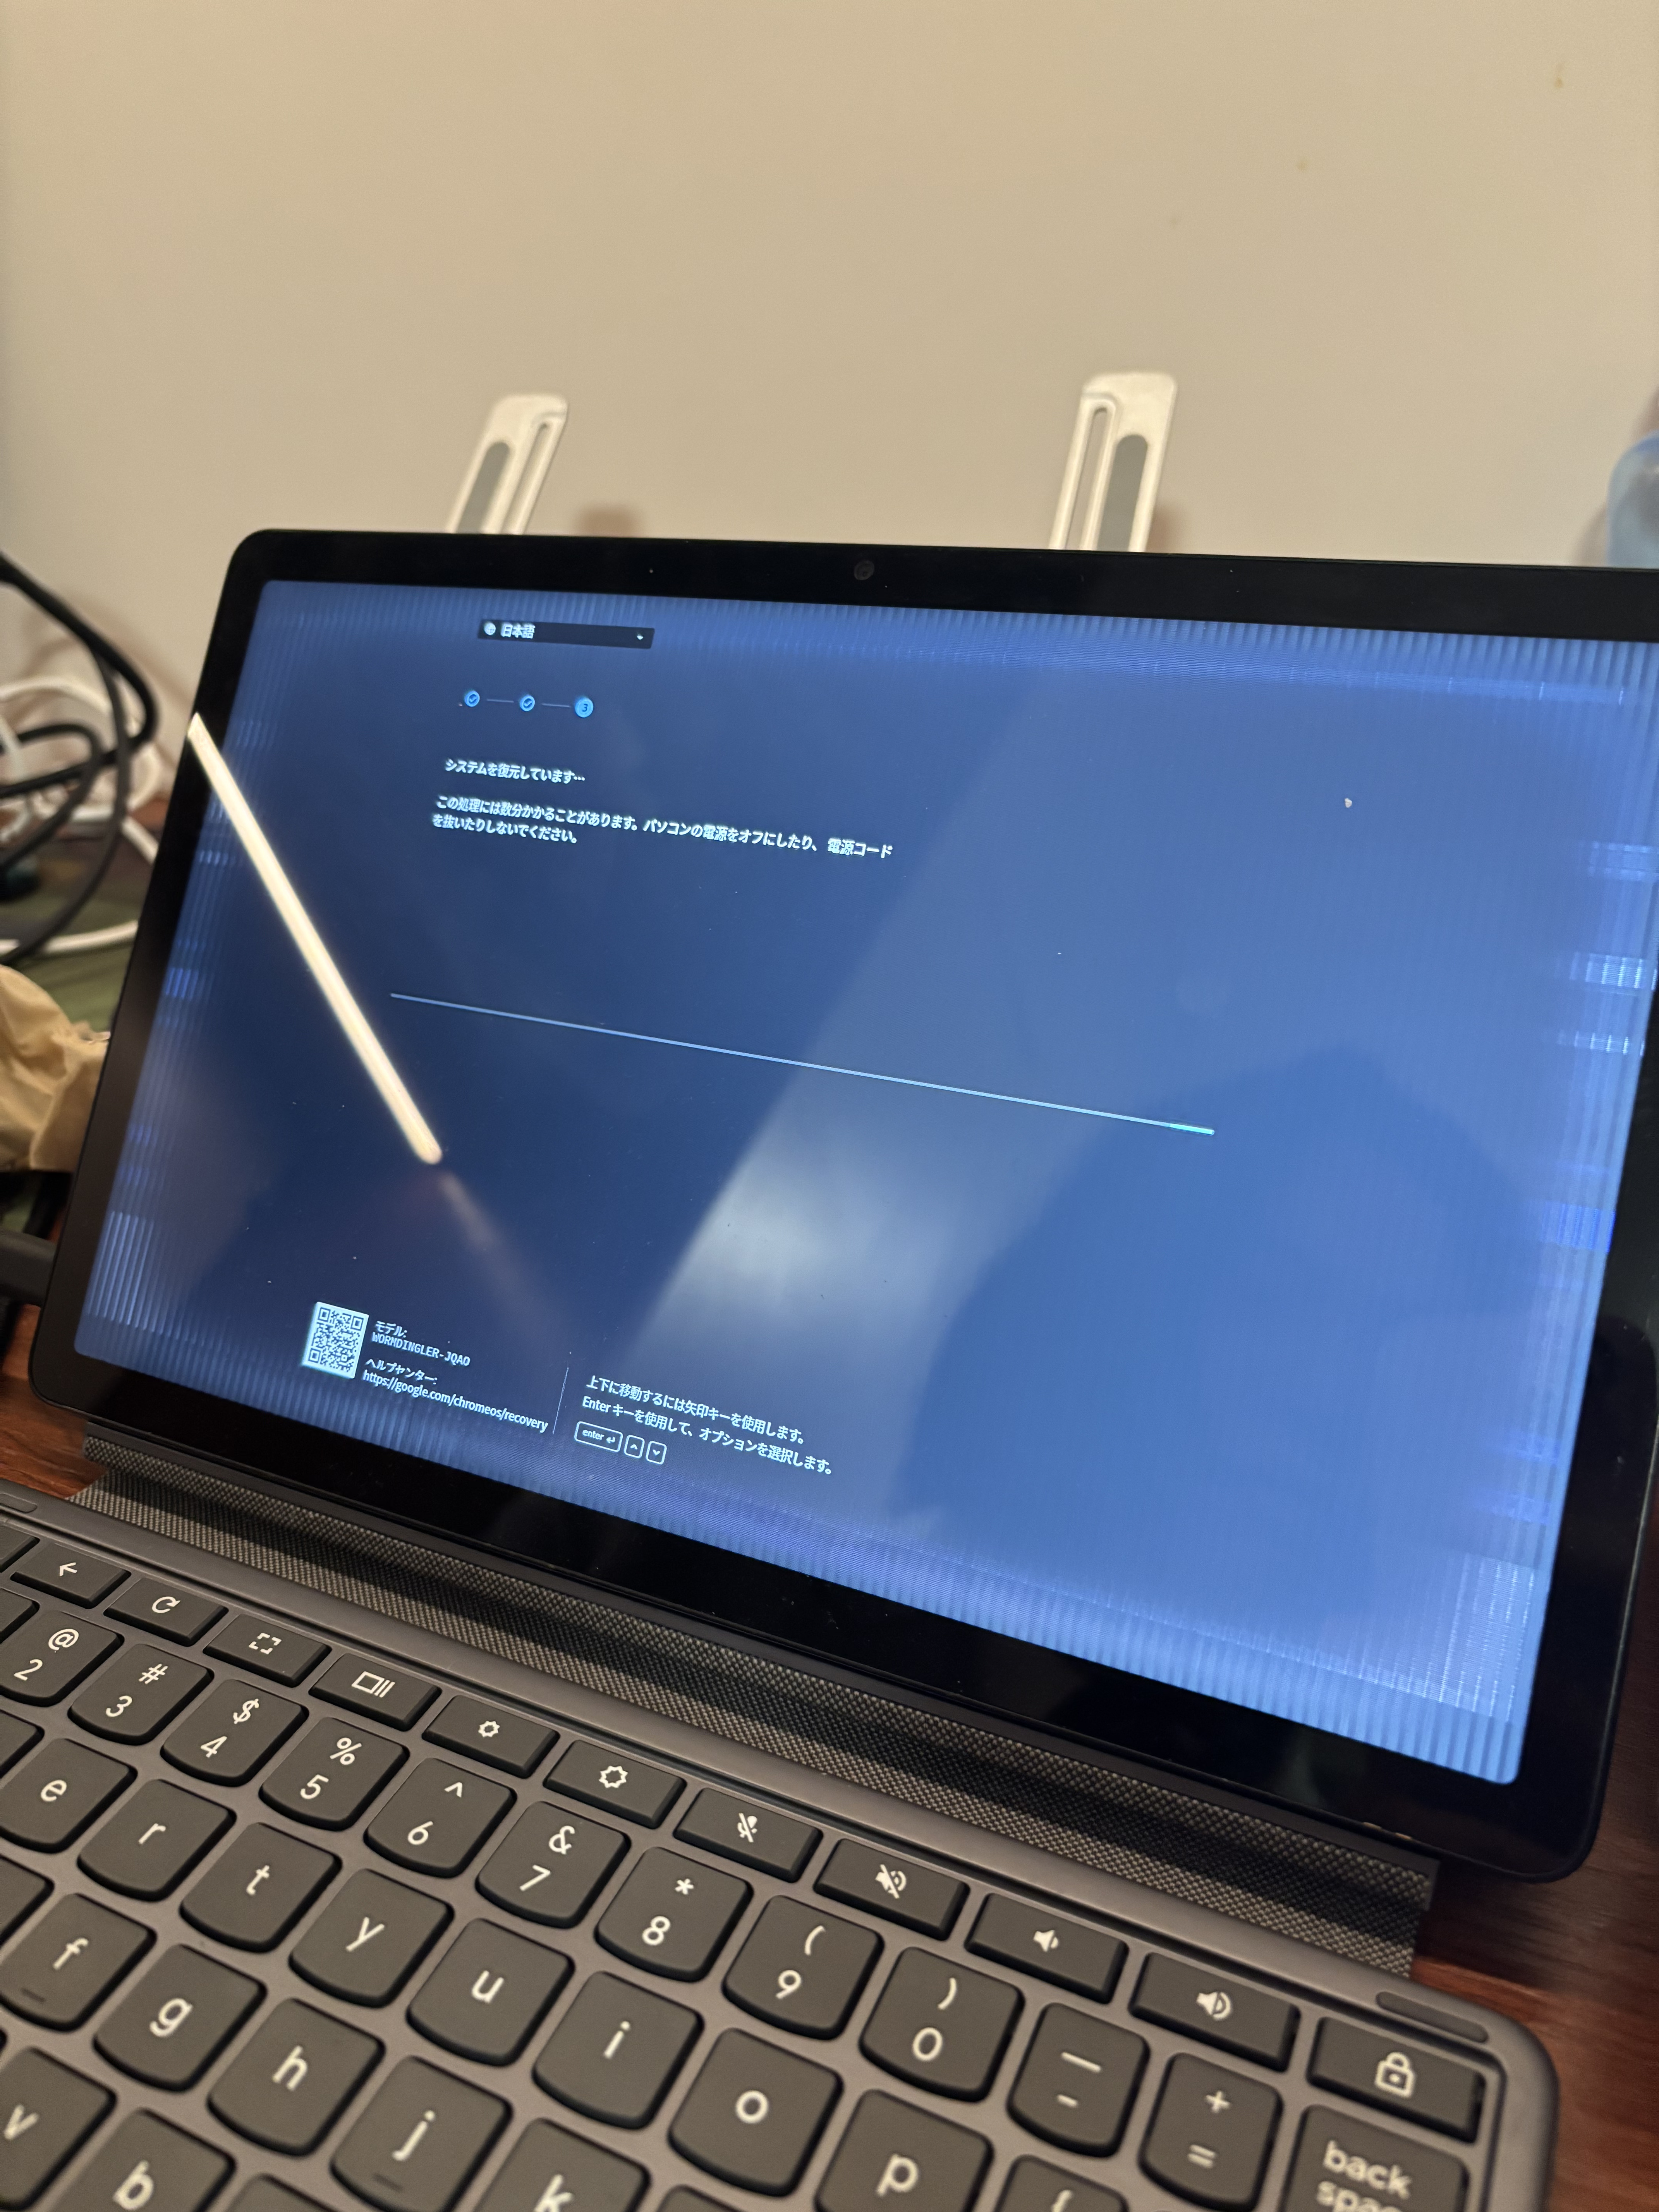
Initially the two of us thought that the graphics driver was busted by the faulty update. We tried to Powerwash (factory reset) the device. We tried to navigate the strobing menus that struggle to form even one row of legible text. We tried to see if connecting to an external monitor helped (it actually did, which is how we came to know this as a problem with the display and not the GPU going kaput). None of this worked. Aleksana even tried to boot her own Mobile NixOS image off of a USB stick, which also completely failed.
Out of complete frustration, we then asked the original seller to give us the recovery media that is known to restore the device to its original state, and only then were we successful in completely fixing the issue, wasting a grand total of 2 days of our lives going back to the exact same spot we came back to earlier.
So, lessons learned, never install any ChromeOS updates on this machine, right?
awkwardly chuckles
You see, once we even managed to follow all the right procedures to install
NixOS on this machine, it still didn’t work. Combining what the Wiki said
with Aleksana’s own expertise, it turns out that the actual method is actually
insultingly easy. You just need to build a complete disk image using Mobile
NixOS (using the v3 CLI instead of the “classic” one here because I like it
better, either one works), and then dd it onto your USB drive:
$ nix build -f. outputs.default --argstr device lenovo-wormdingler
...
$ sudo dd \
    if=./result/mobile-nixos-lenovo-wormdingler.img \
    of=/dev/sda \ # Or sdb, sdc, etc.
    bs=16M status=progress
And in theory, it should boot! (In my case it was a bit more convoluted, since
I wasn’t interested in cross-compiling everything into aarch64-linux from my
x86_64-linux laptop, so I chose to compile this on the Community Builders that
nix-community generously provides, and then download it.) But it didn’t. Why?!
I tried so many things. I thought maybe the devicetree definition got
messed up. Being a pre-production model meant that I indeed had to use a rev1
devicetree, and a specific variant to boot, so I overrode the package used by
Mobile NixOS containing all the devicetrees (.dtb) and force it to only use
the devicetree matching my own device. It still didn’t work. (To this day, I
wonder if it really were necessary at all, or was just yet another red herring.)
I wondered if Mobile NixOS was just buggy. My girlfriend, being a certified Fedora enthusiast™, tried to compile her own build of Fedora and run it on the device. Still nada. I joked that maybe we should just learn Gentoo at this point and apply the same things Google did for ChromeOS. I groaned in complete frustration, and even briefly pondered taking it all apart and finding some debug serial port and verifying if the kernel even booted at all.
“Hang on, can you check which kernel version the working ChromeOS build was using?” Aleksana suddenly remarked, “…why is it running 5.15? That’s ancient history at this point. Even longterm’s at 6.12.”
“You know I don’t have the answer to that.” I let out a defeated sigh.
“Maybe there was a kernel regression between then and now…” she replied
calmly, while she began to type out a prompt into Gemini as a last resort:
“Search for a Linux kernel commit responsible for screen malfunction on my
friend’s wormdingler Chromebook (rev1+ INX panel board) between version
5.15 and 6.12.”
She continues while the LLM parses her request, “Actually, I think the seller mentioned that they put the Chromebook on sale in the first place because they tried to update the kernel and ‘the screen went nuts’. I guess we now know how that looks like.” Guess that one does not simply update Linux either, not just ChromeOS. Makes me wonder if ChromeOS really were to blame for the episode earlier, or had I just been too quick to assign the blame.
Words then sprung onto her screen with that typical LLM-flavored polite cocksureness that only serves to unnerve me, about the possibility that I will be in for a long bisecting session that will surely take up the rest of my midnight coding time and then some. How am I (or the glorified word reassembly algorithm) going to find which exact thing broke in the thousands of commits in between?
And yet, in the midst of my contemplation, a miracle happened.
“Oh yes fucking finally, somebody did their job and documented exactly what got
broken.” She exhaled in relief. Commit 519ce29116, drm/panel: Modify innolux hj110iz panel initial code. First appeared in Linux 6.5. Jackpot in mere seconds.
As it turns out, my display panel was also a pre-production model that never hit the market, as it had some design issues that necessitated tweaking a few frequencies and voltage levels in the kernel. I guess they saw fit to just overwrite the old definition entirely, since this should never affect normal consumers using normal devices. But alas, I am not a normal consumer.
“I swear to god, Gemini is literally an AGI at this point.” She exclaimed, not even hiding a bit of that serendipitous high after sniping the bug that could have costed hours of wasted time for the two of us. “Let me just ask it to make a patch that would work on 6.12, see if that clicks.”
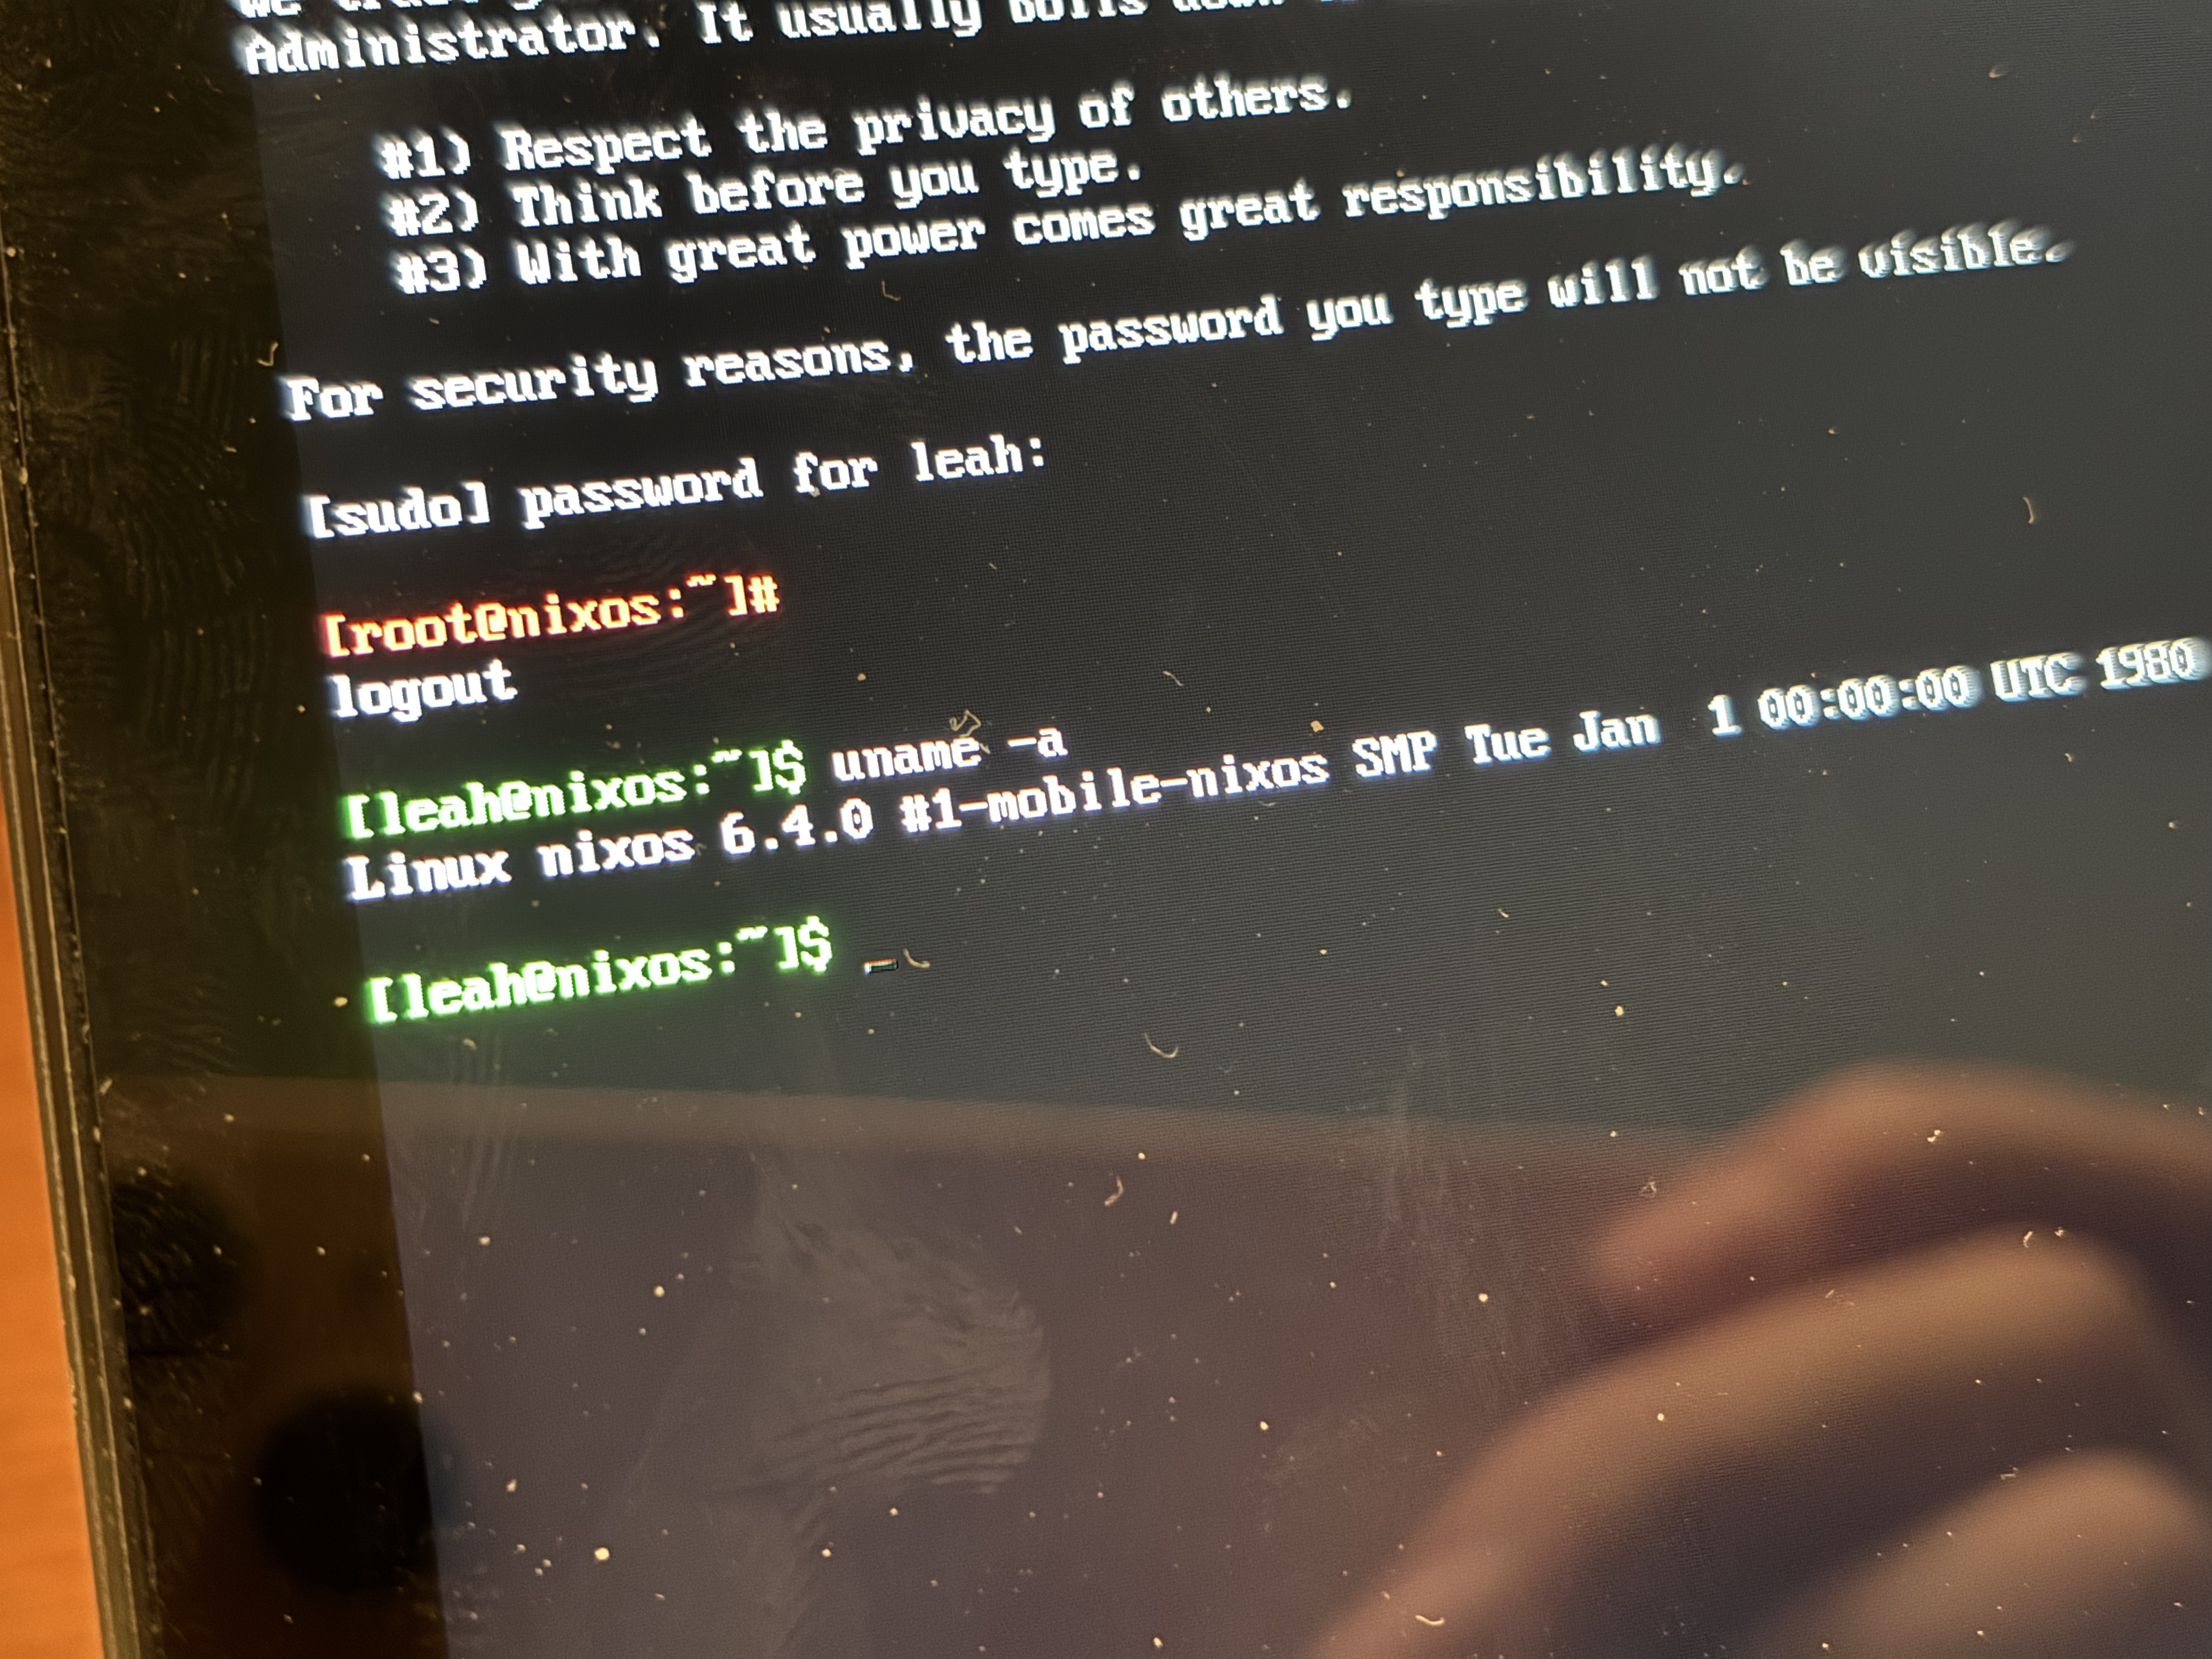
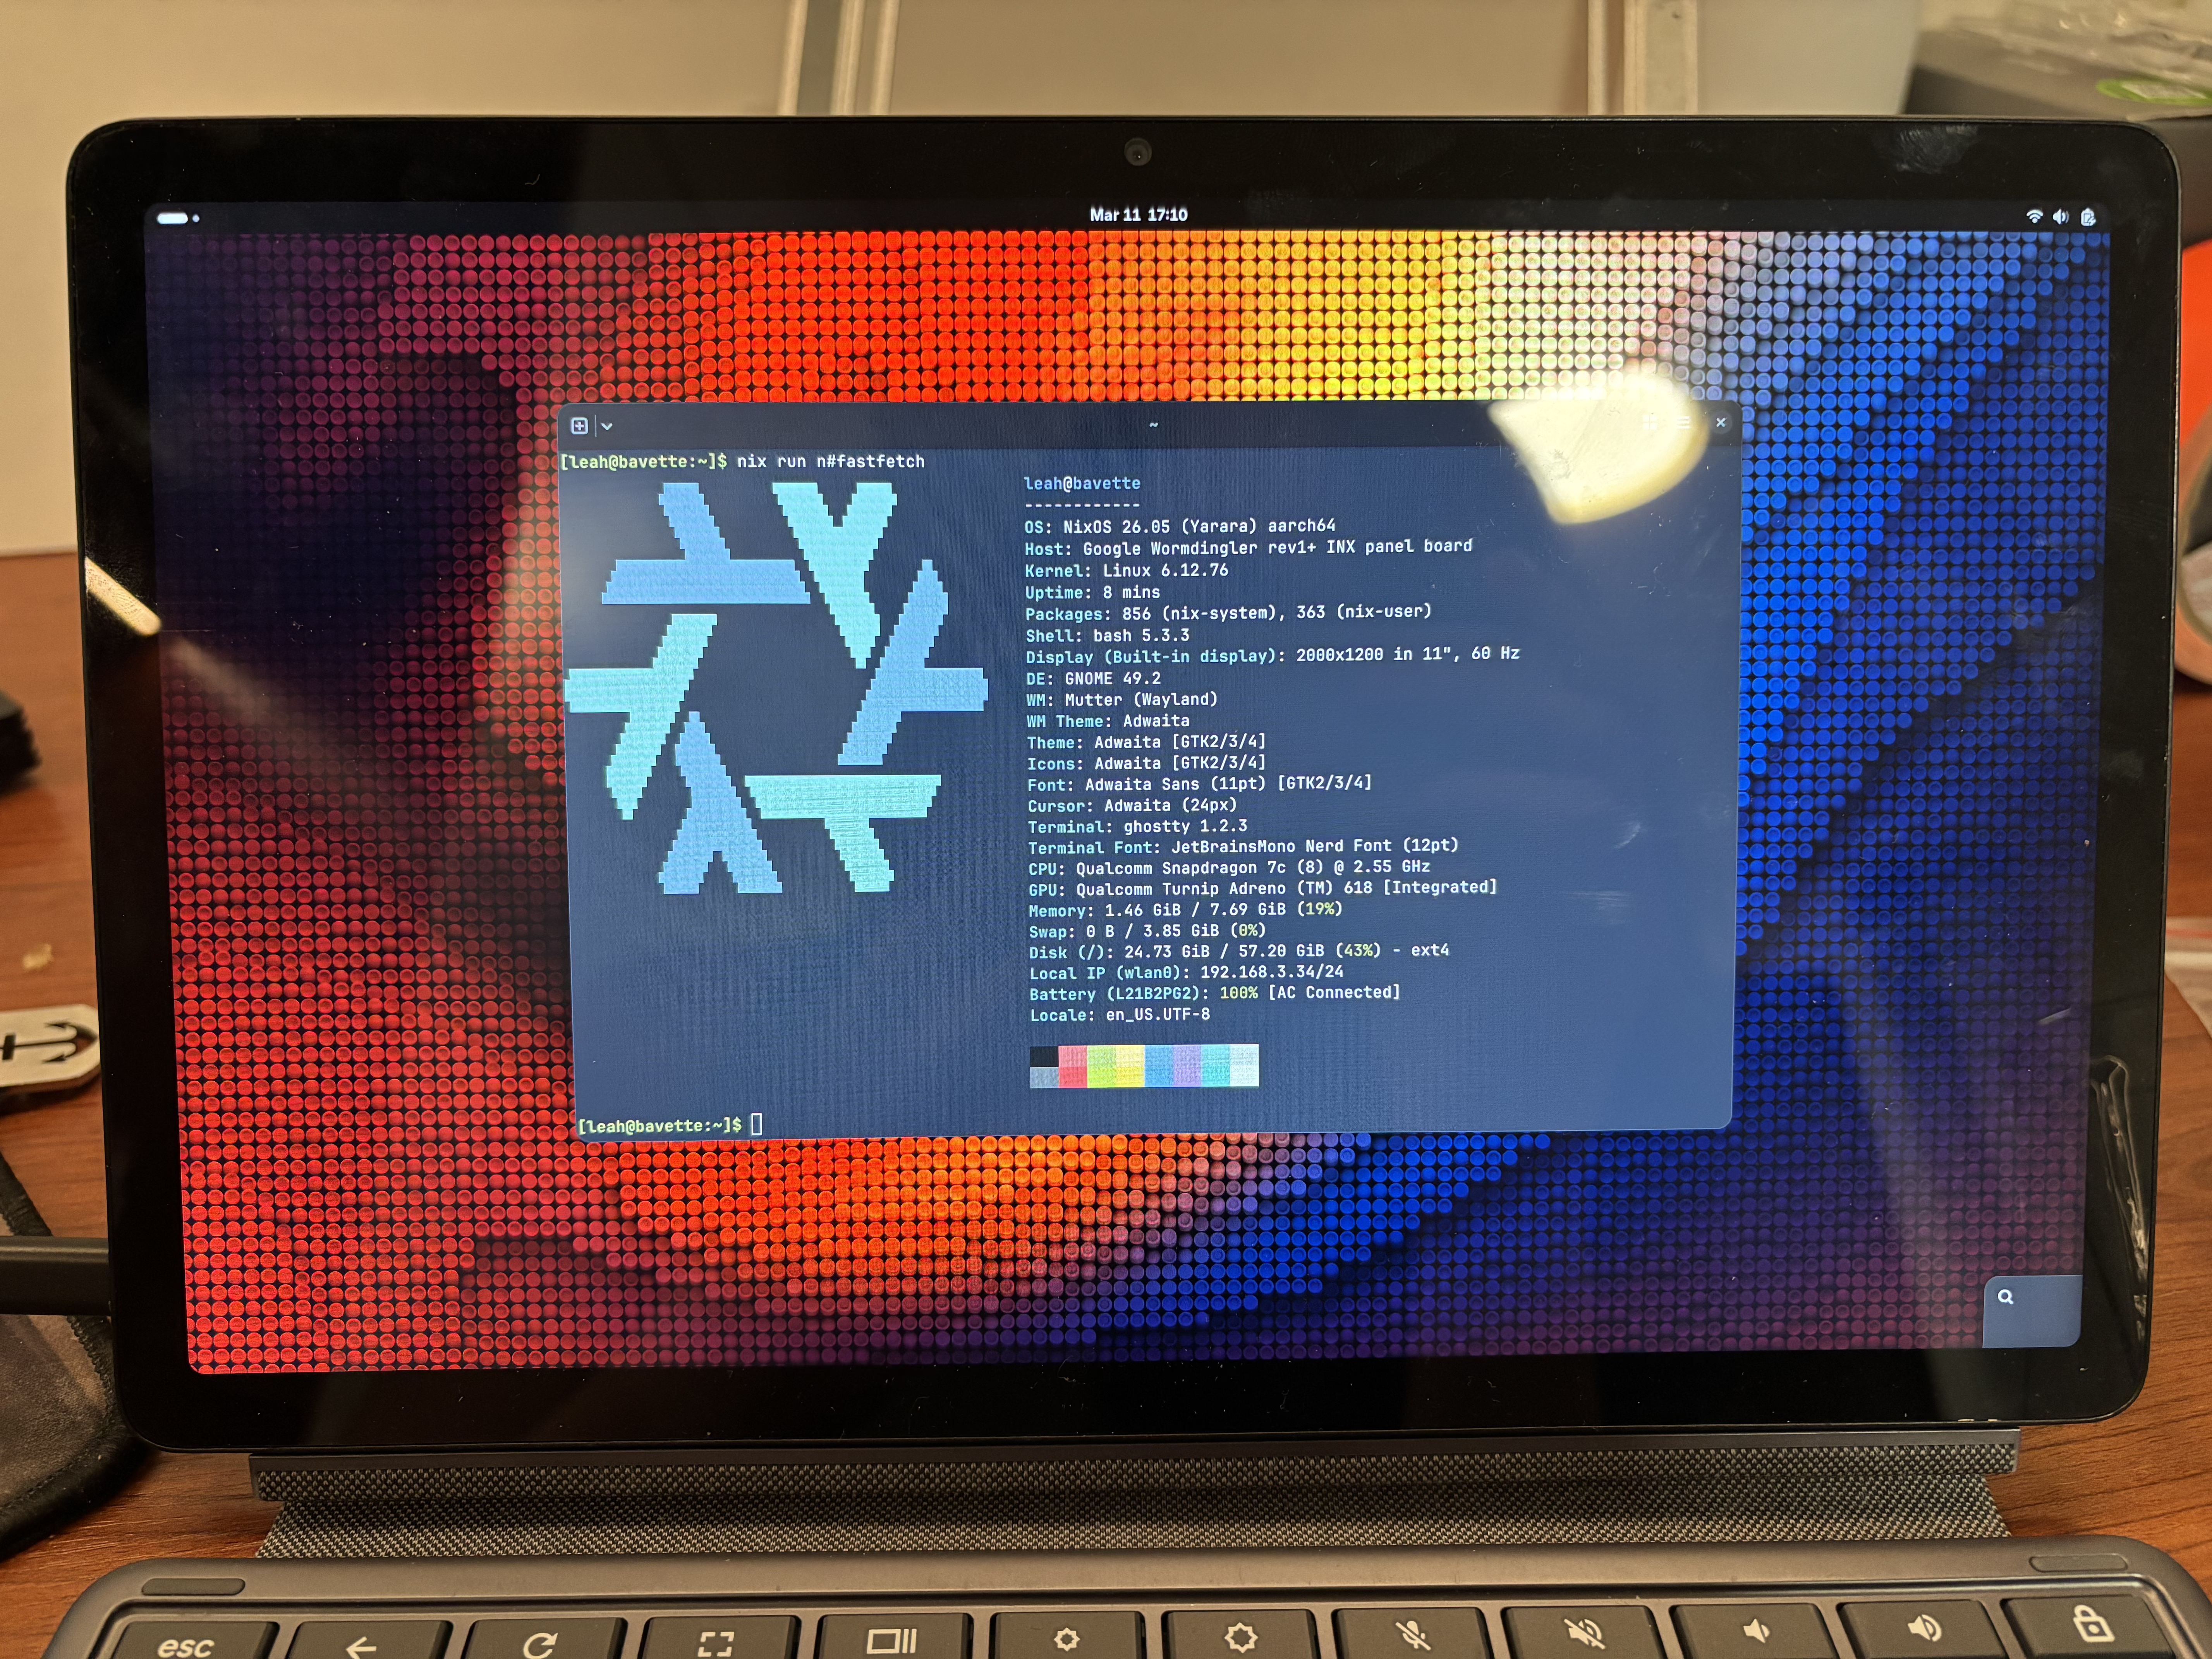
The patch worked. Lo and behold, the green-and-white text starts to scroll in neat, legible rows against the black background, as the kernel and the various userspace utilities spring to life. Rootfs mounted. systemd brought up all userspace services. It even came with a splash screen that truly seals the deal:
It lives.
IV. NixOS, Ahoy!
So! We are in NixOS. Hooray!
But the suffering is far from over.
For starters, the “build remotely → dd locally” workflow was really
tedious. Every time I make a change in the NixOS side, I have to rebuild
the entire disk image (or just the kernel partition if I’m lucky), and
download the entire thing from the remote. God bless rsync for supporting
compression and skipping over duplicate bytes out-of-the-box. I would turn
feral if I have to download the entire 3 GB package from scratch every time.
Maybe I’m too dumb for this, but I wish there was an option to download most
of the cached aarch64-linux dependencies and only resort to cross-compilation
from x86_64-linux for custom builds like a mobile-friendly kernel and
kernel partition setups. But of course, now that I’ve put this out there,
there’s gonna be some Nix guru lurking in the shadows who can tell me the
exact concoction of flags, environment variables, Nix settings and
experimental features to get this working — I’m open for any sort of input
in this regard :)
All of this faffing about is necessary because since the default configuration in classic, minimal boot image fashion:
- Doesn’t have a default user/password set
- Doesn’t have SSH enabled by default, so no remote logins
- Doesn’t contain the firmware required for the builtin modem, as it has sinned against man for being lowers voice unfree unredistributable proprietary crap extracted from a ChromeOS rescue image (I don’t have a dongle that has an Ethernet connection so that’s out of the question, too)
- Doesn’t come with NetworkManager by default so just having the firmware doesn’t help, either
- And so on.
But I soldier on. I can see that the end is in sight, that soon I can be
done with all of this and return my life back to its regularly scheduled
programming. I rebuilt the disk image maybe a dozen times over a single
day, torturing my poor USB stick to the point I had to wipe the entire
drive clean and reload the full image, as the read/write speeds have
apparently fallen down to kB/s levels. (No, I’m still not sure how that
happened.) Apparently the image also got corrupted once, but I chalk
it down to careless rsync usage after hours of tinkering. Did I mention
also that I live in China and have to set numerous proxy flags (and
had to find a way for Nix build environments to respect them)
to avoid downloading hundreds of megabytes of dependencies at Kbps-level
speeds?
At long last, my Chromebook was ready to see some action, armed with NixOS, GNOME, and all the software I usually need. I decided to forgo my usual Niri-based setup since it’s somewhat limited in terms of touchscreen gestures, but that could be a project in and of itself1.
I even discovered that the Arm CPU was more than powerful enough to compile its own software, so that’s what I did to minimize occupying even more shared resources and further deterioration of my own sanity, gradually building up from a bare environment to the setup I’m more familiar with. Every time I perform this manual bootstrapping process I wish I had set up some sort of basic, network-ready system that can then be used to build any system configuration I want locally, but my neurodivergent brain regularly excises this desire out of my memory until I really want it again.
Finally, all that’s left are some small fixes.
“Small.” What a funny word.
V. Finishing Touches
You know, it’s really ironic how I went through all this trouble to run NixOS on this thing, just to use it for what Chromebooks are best known for — browsing the web and watching YouTube. And “education”. Supposedly. That’s when I realized that whenever I watch a video, the framerate drops down to 15 fps for a brief moment, while the CPU overloads and starts to make everything just a bit less responsive. It actually starts to become warm to the touch. All telltale signs that hardware video decoding isn’t working.
Now, this hasn’t been my first rodeo when it comes to the desolate, fraught nonsense cascade that is hardware video decoding on Linux, and my initial thought was one of learned helplessness: ah, of course hardware decoding’s borked. Typical. But then I realized that ChromeOS is also just Linux in the end, and that it must’ve worked there, as my power usage doubled to over 6 watts while my battery life suffers. I must have been doing something suboptimally.
Indeed, the SoC’s datasheet states that it supports decoding H.264, H.265,
VP8 and VP9 video. So I thought to myself, maybe Adreno GPUs just don’t have
the best VA-API support. I ran vainfo, which failed to load
/run/opengl-driver/lib/dri/msm_dri_video.so — I wasn’t too surprised
about given this happens sometimes even with some of the best GPU drive— wait,
what do you mean that the shared library flat-out doesn’t exist?!
And that’s when my jaw dropped: one does not simply VA-API on these Adreno GPUs. No, no. In fact, the GPU has nothing to do with this situation — it’s just my naïveté that led me to believe mobile computing is bound to the conventions of desktop computers, plus the fact the decoder is grouped together with the GPU (but not under it) in the datasheet.
What’s actually happening is that the decoder is a separate component parallel to the GPU within the SoC, codenamed “Venus” by Qualcomm2, which is accessible via a Video for Linux 2 Memory-to-Memory (V4L2 M2M) Stateful Decoder interface. Some of you might know V4L2 as the kernel interface that makes cameras work, for example, but this is something else entirely.
In brief, you feed the decoder a H.264/H.265/VP8/VP9 data stream, and it spits out full video frames into another stream in a stateful manner. That stream can then be blit onto a DMA buffer and make it way into the compositor and shown on screen.
All that theory sounds good, but as with most horror stories around hardware video decoding on Linux, one question needs to be asked: how’s the browser support?
Well… as it is par for the course, it varies. V4L2 decoding is supported across a bunch of programs because this is very similar, if not identical, to how the Raspberry Pi 4 implements hardware video decoding, so there’s a huge incentive to get this working in popular programs like browsers and video players.
However, as a diehard vanilla Firefox user, I was really frustrated with
the experience and how painfully opaque it is when disclosing which exact
media decoder backend it’s using. On Chromium it’s simply a matter of going
into the inspector, opening the media tab, and clicking on the active media
stream (chrome://media-internals also works); on Firefox it is a trial through
grepping debug logs, turning random flags on and off, and monitoring
per-process CPU and video decoder usage like I’m about to perform a
side-channel attack against my own browser. I gave up halfway after
interrogating Claude for hours as to how I can get more useful evidence to
divine which exact codepath Firefox is getting itself stuck under.
Claude said that Firefox eventually tries to fall back to FFmpeg, and that
FFmpeg’s support for V4L2 is spotty and so it just uses dav1d or vpx or
something… I have no idea, and I’m honestly not interested in probing
a black-box that might take actual hours to rebuild.
Chromium on the other hand painted a much rosier picture. After all, this is just Chrome without all the fun proprietary branding and DRM stuff. Surely it couldn’t’ve been that bad. And judging by the end result, it wasn’t that bad! All you needed were these two flags:
$ chromium --ozone-platform=x11 --enable-features=AcceleratedVideoEncoder
…Which is also exactly what the NixOS Wiki tells you to do. I take the hours I spent on finding this as direct divine retribution for ignoring Linux wikis as worthless outdated garbage that no sane person should rely upon. I am sorry — I was wrong. Well not entirely, since I didn’t have to turn off the GPU blocklist or manually enable zero-copy video rendering, but I did have to force Chromium to use X11 (eugh).
The reason behind this isn’t entirely clear, but when I tried to do this
on Wayland, it detected the V4L2 decoder correctly and even decoded the
frames correctly, but then I encountered some strange issues relating to
eglCreateImage errors and the like. I’m gonna assume that Wayland doesn’t
like it when you try to copy frames from a V4L2 stream directly (or indirectly)
into an EGL image, and it will just combust into flames when you do so.
I don’t know. I might consider reporting this to Chromium at some point,
but honestly this is way out of my knowledge domain that I’ll let somebody
more experienced on this topic to discern what exactly went wrong here.
But hey! We got actual, performant video decoding, which means this little Chromebook was already able to do everything it could on ChromeOS, while running glorious NixOS, doing compilation tasks, acting like a thin SSH client for my infrastructure when I’m travelling, and so on. It has already become everything I need it to become.
If there’s anything I felt was a bit lacking, it was the 64 GB eMMC storage. eMMC by itself is already not great against a real, upgradable NVMe SSD, and the Nix store eating up 30 GB of it with all the junk I had crammed in there is certainly an annoying limitation. The battery life was quite long but not as outstanding as I imagined, but I think that’s probably because it only contains 30 Wh of charge instead of the 90+ Wh bordering-flight-legal monstrosity one would find in a regular laptop. I also kind of wish we can use a “normal” bootloader like GRUB which supports switching between generations and specializations, but apparently that’s a complete no-go for Arm devices, which is honestly a bit of a let-down.
Still, I am very happy that I made it all the way to the end, and I’d like to once again extend my thanks to Aleksana for both gifting me this device and enduring all the bullshit I threw at her for the week-long tinkering process. You have the patience and generosity of a saint. Hopefully you, the reader, might also be inspired to pick up one yourself one day. May the sanctity of Nix bless more machines to come.
Appendix. An Actual Walkthrough
If you’re just here to see me suffer, then I think the vast majority of this post has demonstrated why I normally dislike tinkering with non-mainstream hardware, even when the outcome was eventually pretty great. But I felt like I need to do everybody a service and actually condense what I did into an actual guide so that people won’t repeat the same dumb mistakes I did.
So here goes:
-
You need a device in “developer mode” (i.e. bootloader unlocked) and some sort of bootable media that is at least 4 GB large. My device only has USB-C ports so I used a dongle plus a USB stick I commonly use for booting disk images, but you can use a SD card or something more exotic if you like.
-
Clone the Mobile NixOS repo. This is technically optional, but you probably want/need to make a few local changes for your specific device.
$ git clone https://github.com/mobile-nixos/mobile-nixos $ cd mobile-nixos -
Create
local.nixdirectly under the repository’s root directory (next todefault.nixet al.) This is your temporary configuration file, where you should at least create a default user with root privileges, set a password, turn on networking (e.g. via NetworkManager), maybe turn on OpenSSH, and install required firmware.For Wormdingler, you must install the proprietary modem firmware in order to have functioning internet access:
{
  hardware.firmware = [
    pkgs.chromeos-sc7180-unredistributable-firmware
  ];
}
You could technically forgo installing the firmware, but why make life difficult for yourself?
-
Build the full disk image for your device (replace
lenovo-wormdingleraccordingly):$ nix-build -A outputs.default --argstr device lenovo-wormdinglerOr equivalently this with the unstable Nix v3 CLI, which I prefer:
$ nix build -f . outputs.default --argstr device lenovo-wormdingler -
Flash the disk image onto the boot medium. You can use any utility you want for this, but I just went with
dd(replace/dev/sdawith your drive, which you can find viafdisk -l). Replace the name of the disk image to your situation, of course:$ sudo dd if=./result/mobile-nixos-lenovo-wormdingler.img of=/dev/sda bs=16M status=progressI especially recommend specifying
status=progresssince you won’t have to stare at a silent running process, wondering if you’ve done something terribly wrong. -
Turn on the device and select “Boot from external disk” on the developer mode boot menu, with the boot medium plugged in. If it fails to detect a boot medium it will prompt you to plug in one. You should be greeted with the Mobile NixOS splash screen as it tries to grow your root partition. This takes a while, and this is normal.
The way these Chromebooks work is that they treat internal storage completely identically to the external medium, meaning that it cannot magically work off of a static, LiveCD-style setup for normal desktop PCs. And yes, this means it expects the external medium to be writable and has enough free space for i.e. temporary directories and logs.
This is a significant enough conceptual difference that it’s even noted on the Mobile NixOS wiki:
One of the important thing to realise is that you will likely need to
ddthe image to a storage media, either external or internal.If something did go wrong, one thing to note is that you can save time by just rebuilding the contents of the kernel partition by building the
kpartoutput anddd-ing onto the first partition of your boot medium. (The second partition is the root file system, which is sadly compressed and not directly writable. Rebuild the entire thing if you need to change anything in userspace.)$ nix build -f . outputs.kpart --argstr device lenovo-wormdingler $ sudo dd if=./result of=/dev/sda1 bs=16M status=progress -
Hopefully you arrive at a user shell with
sudoaccess, a working internet connection, and all these other goodies, since it’s time to overwrite the internal storage with NixOS. Make a copy of the boot image and move into the device, and run the sameddcommand but within the device itself. You should expect to find a Wormdingler’s eMMC storage at/dev/mmcblk1:$ sudo dd if=mobile-nixos-lenovo-wormdingler.img of=/dev/mmcblk1 bs=16M status=progressOnce you’re done, the internal storage should mirror the structure of your external medium, with the first, smaller partition containing the kernel, and the second, larger partition containing everything else, including userland data and the Nix store. Run
sudo fdisk -lto confirm:Disk /dev/mmcblk1: 58.24 GiB, 62537072640 bytes, 122142720 sectors Units: sectors of 1 * 512 = 512 bytes Sector size (logical/physical): 512 bytes / 512 bytes I/O size (minimum/optimal): 512 bytes / 512 bytes Disklabel type: gpt Disk identifier: B0486952-DB96-4EBD-8C61-BEF753FD69DB Device Start End Sectors Size Type /dev/mmcblk1p1 2048 264191 262144 128M ChromeOS kernel /dev/mmcblk1p2 264192 122142686 121878495 58.1G Linux filesystem -
Restart the device and select “Boot from internal disk” in the boot menu. If everything works alright, then you have now successfully installed NixOS on your Chromebook!
These steps should work, in my estimation, for all depthcharge-based Arm Chromebooks. If you have a x86-64 Chromebook or have a different bootloader, things might work very differently. Always make sure to check the Mobile NixOS wiki for specific details, even if they might not have been elaborated upon!
Footnotes
-
Aleksana told me to just copy her Niri fork, but I declined for want of my own limited sanity. ↩
-
Interestingly enough, if you search for “qualcomm venus” in the search engine of your choice, the only results you’ll find are within Linux Kernel Archives, or from this Black Hat USA 2019 briefing titled “Bypassing the Maginot Line: Remotely Exploit the Hardware Decoder on Smartphone” from a team from Tencent, who abused it to defeat secure boot. Huge shout out to the team and Black Hat for making the recording, slides and white paper available for us all to study. ↩